myfastfile.juan.tax (Fast File) has been integrated into Juan Accounting as JuanTax since March 15, 2026. This means that all tax compliance will be done in Juan Accounting from this date onwards.
Your data will be securely stored for the next 5 years. You may request access to your data by completing this form: https://share.juan.ac/request-ff-data
Data requests will be sent via email by April 30, 2026.
No, your data will not be automatically migrated. You will need to request a data retrieval to access and transfer your previous records into Juan Accounting.
There is no need for you to disconnect the integration. This will not cause any issues.
IMPORTANT: before starting a generation of tax form make sure you have filled up these organization details since these will be automatically pulled into the tax forms.
Setup Fields | Location |
Organization Name | Settings > Org Details |
Legal Entity Name | Settings > Org Details |
Organization Email | Settings > Org Details |
Phone Number | Settings > Org Details |
*VAT ID (TIN) using the format: 111-222-333-444 | Settings > Org Details |
All fields in BIR Details (Taxpayer classification, RDO, VAT Registration, Date, Citizenship) | Settings > Org Details > Compliance |
Complete Address | Settings > Org Details > Addresses |
Primary Delivery Address | Settings > Org Details > Addresses |
*VAT ID field does not necessarily mean you’re VAT registered. This field is for TIN.
Follow these steps to use the new JuanTax Fast File inside Juan.
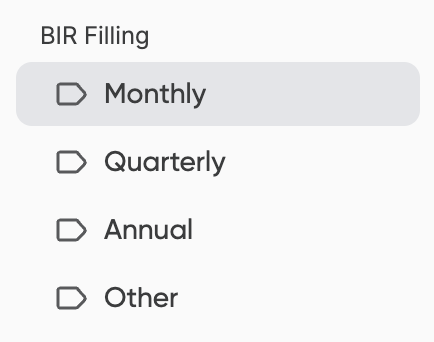
Step 1: Choose an organization then head over to Mailbox and choose between different options: Monthly, Quarterly, Annual, Other.

Step 2: Click Start Submission then choose a tax form you want to generate. Select the Type and Date of the form.

Step 3: Fill in the details and click Save or Submit for Approval.
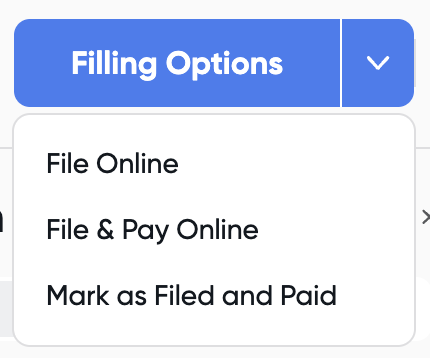
Step 4: Once the tax form is active, click the form and you can proceed to the Filing Options.
0619E, 0619F, 1601C, 1600VT, and 2550M are now live. More BIR forms will be released soon.
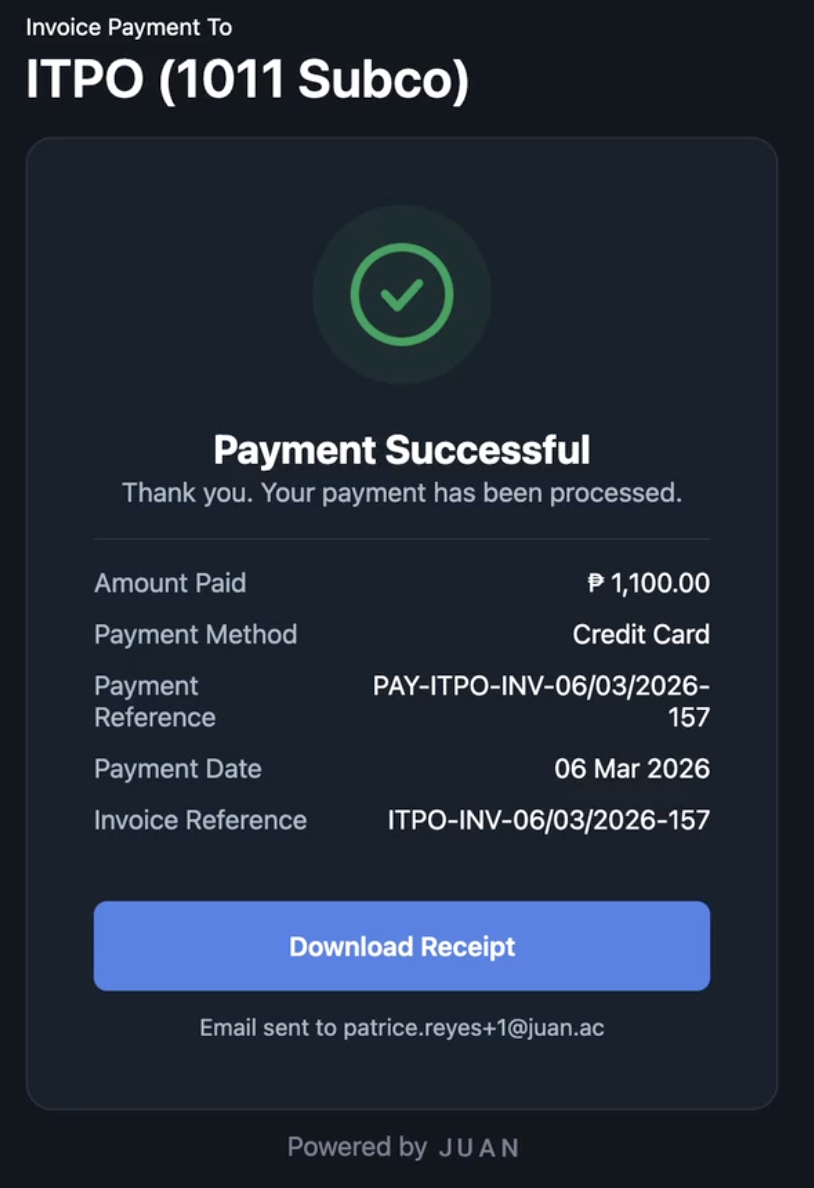
When you opt to File & Pay Online, you will be redirected to the tax payment screen.
Choose from the available payment options.
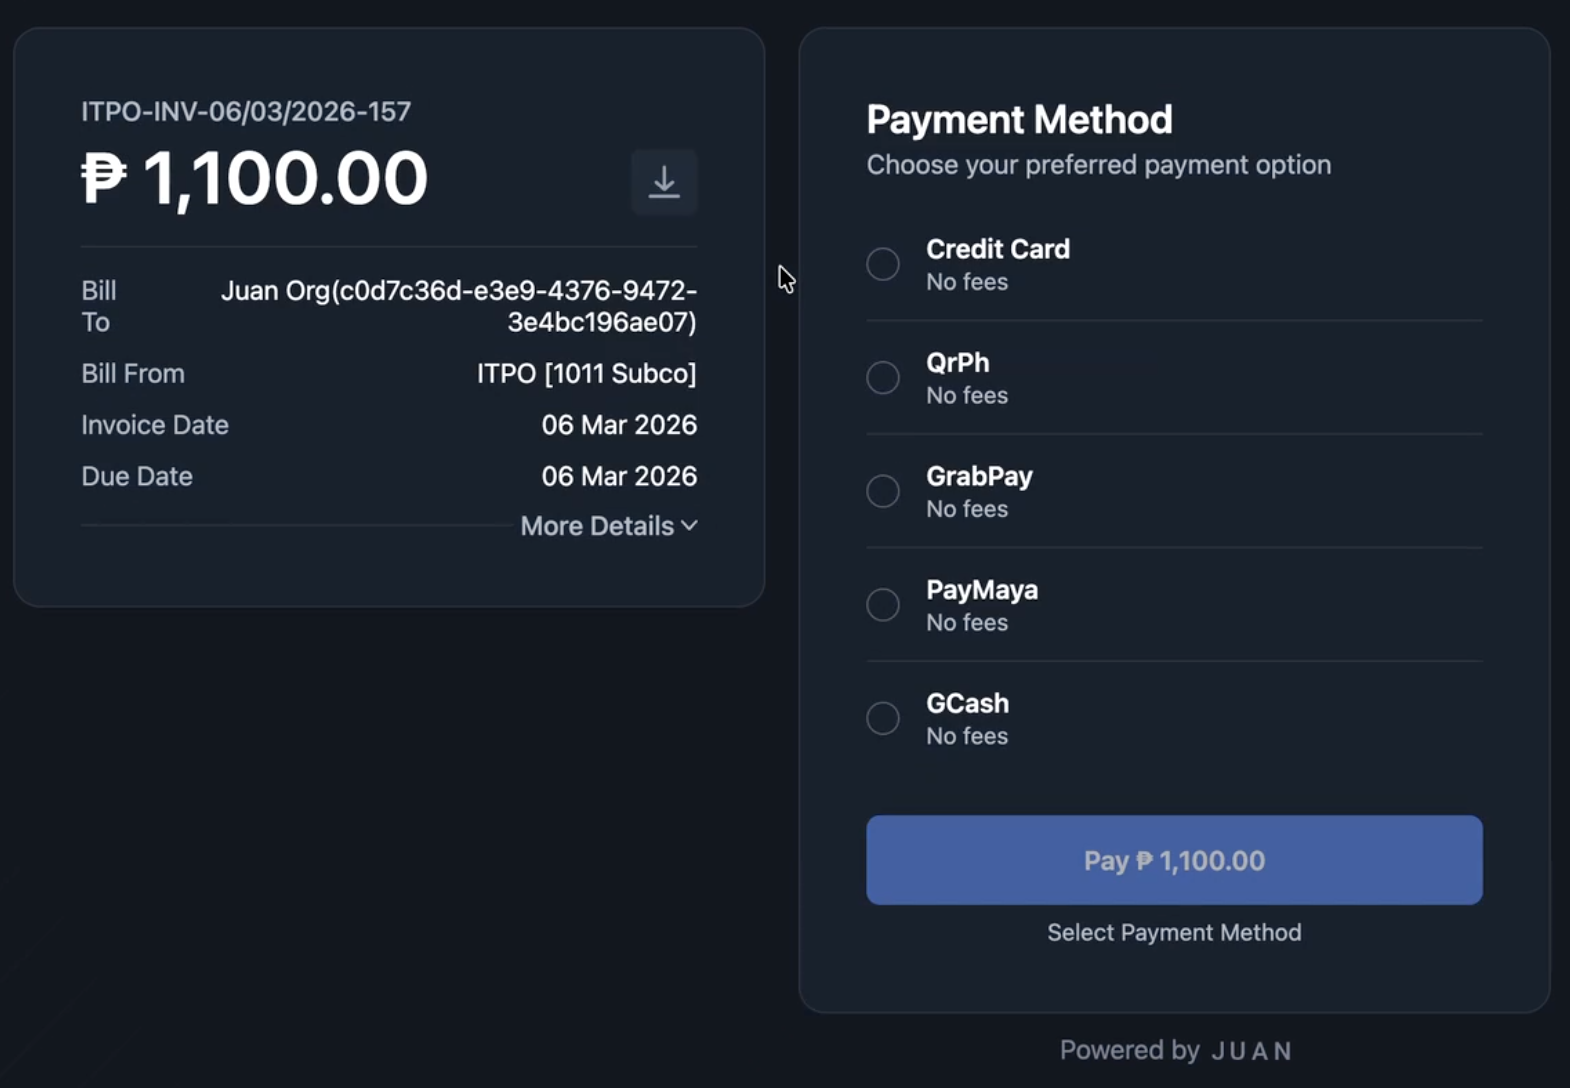
You can then download the payment receipt.
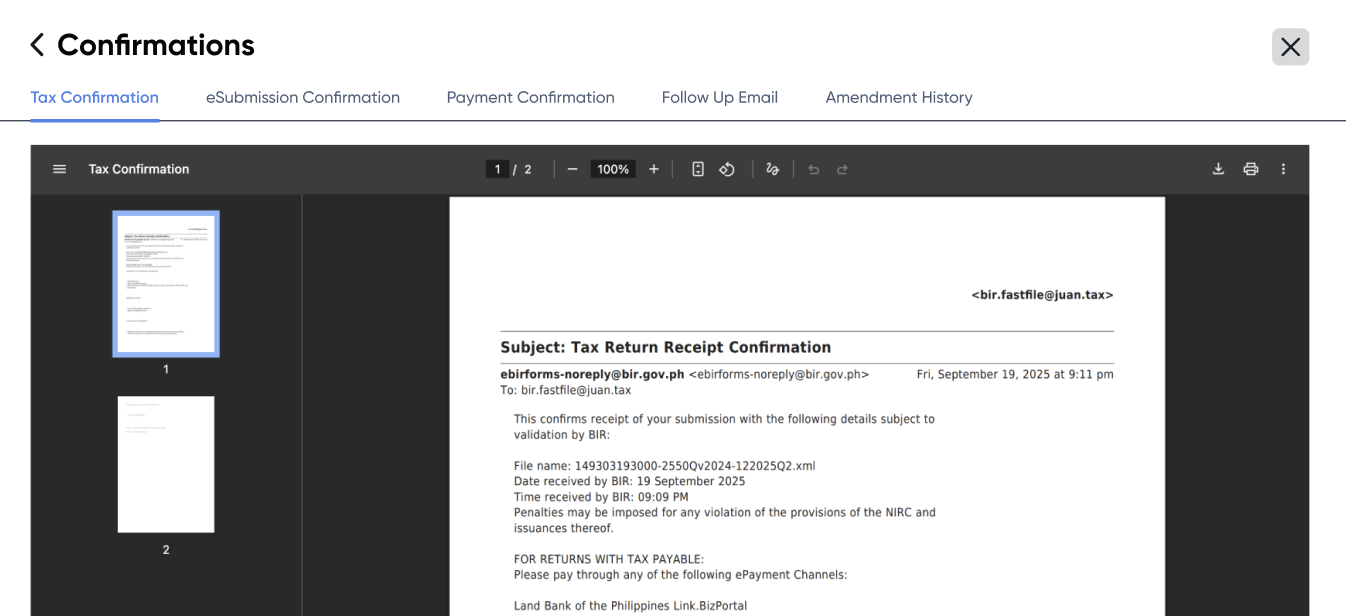
Once a tax form is in Filed and Paid status, you will be able to view the Confirmations.
Filed and Paid > Choose a form > View Confirmations

You’ll be able to see all confirmations availble such as tax, eSubmission, payment confirmations and more.
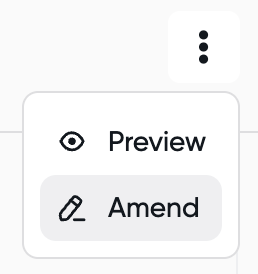
Open a tax form and click the three dot icon.
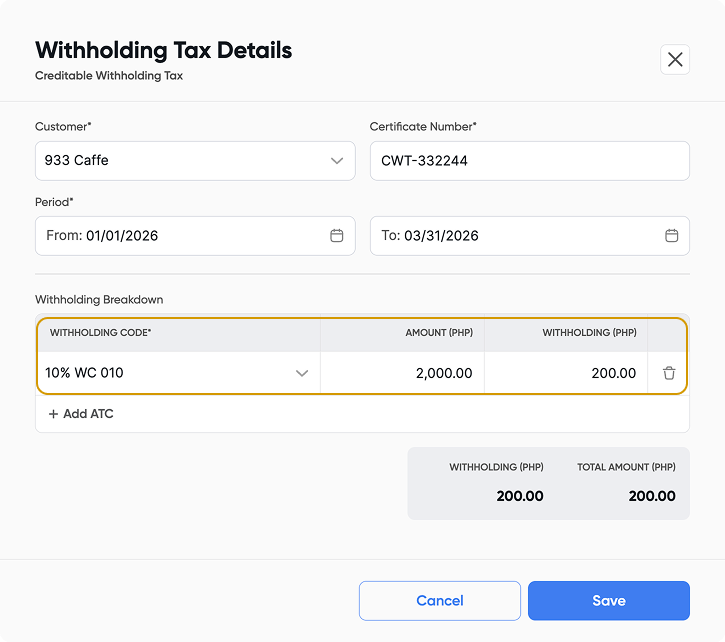
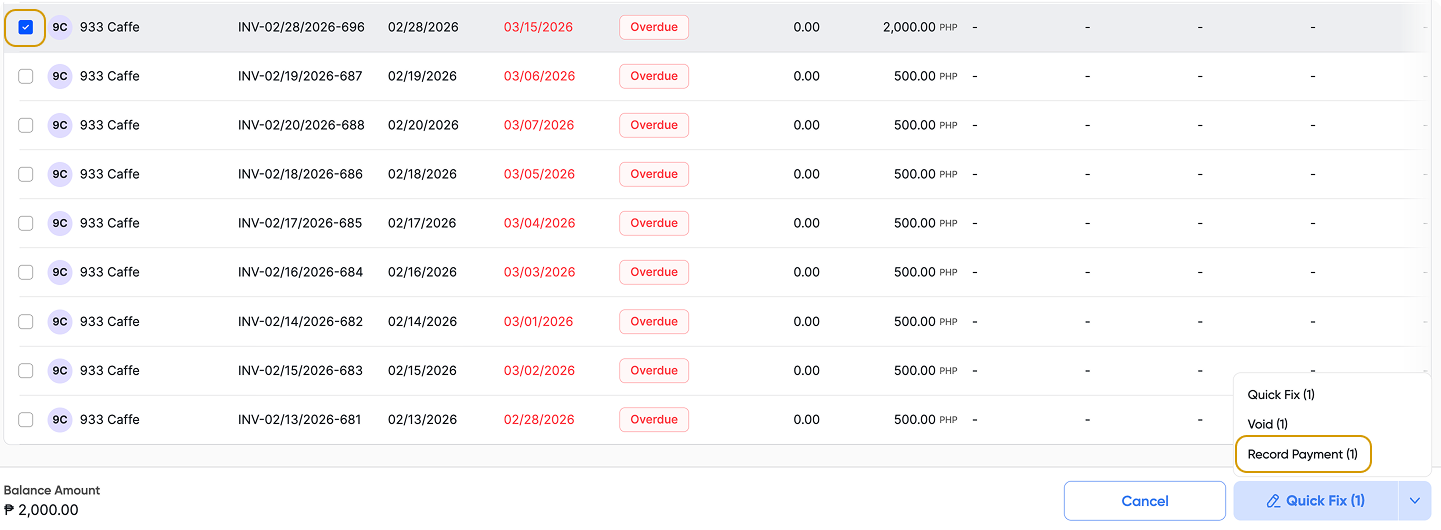
A CWT is a form of credits you can apply as payment to your invoice. Choose the checkbox of the invoice you wish to record CWT > click Record Payment > this will open the Batch Payment function.
Note: you can apply this to multiple invoices.
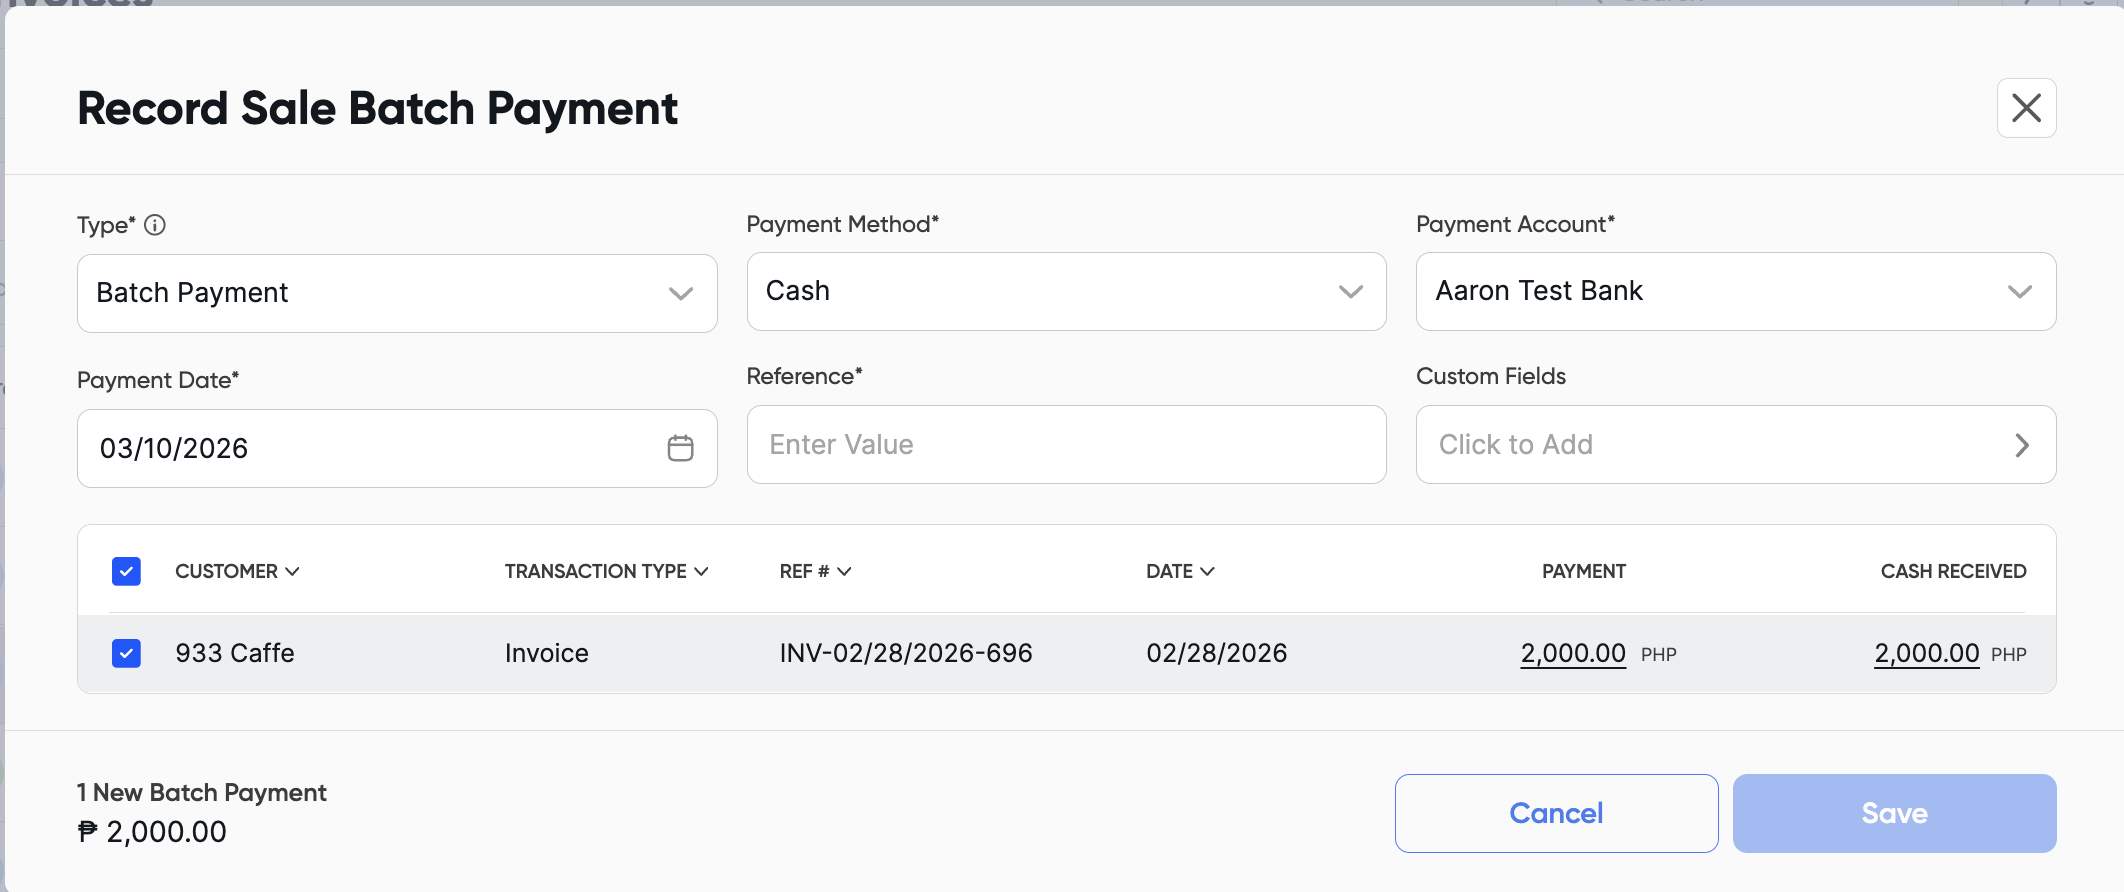
Click the Cash Received amount to edit it and enter the amount withheld by your client.
For example, if the invoice is ₱2,000 and the client withheld ₱200 (10%), change the cash received amount from ₱2,000 to ₱200.
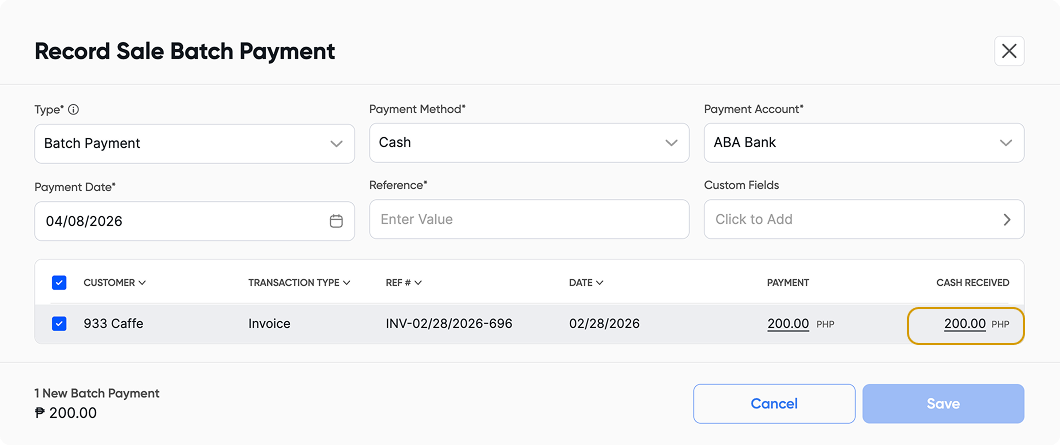
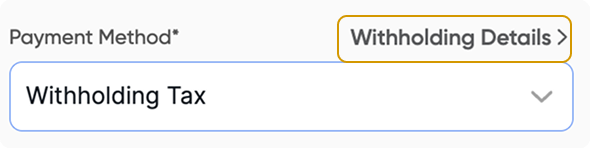
In Payment Method > Choose Withholding Tax > Click Withholding Details > Fill in all the details from the CWT > click Save
In the withholding breakdown, ensure that the invoice amount is entered in the Amount column, and the corresponding withholding value is placed in the Withholding column.
Also, verify that the selected period is accurate so these details are reflected correctly in the appropriate tax forms.