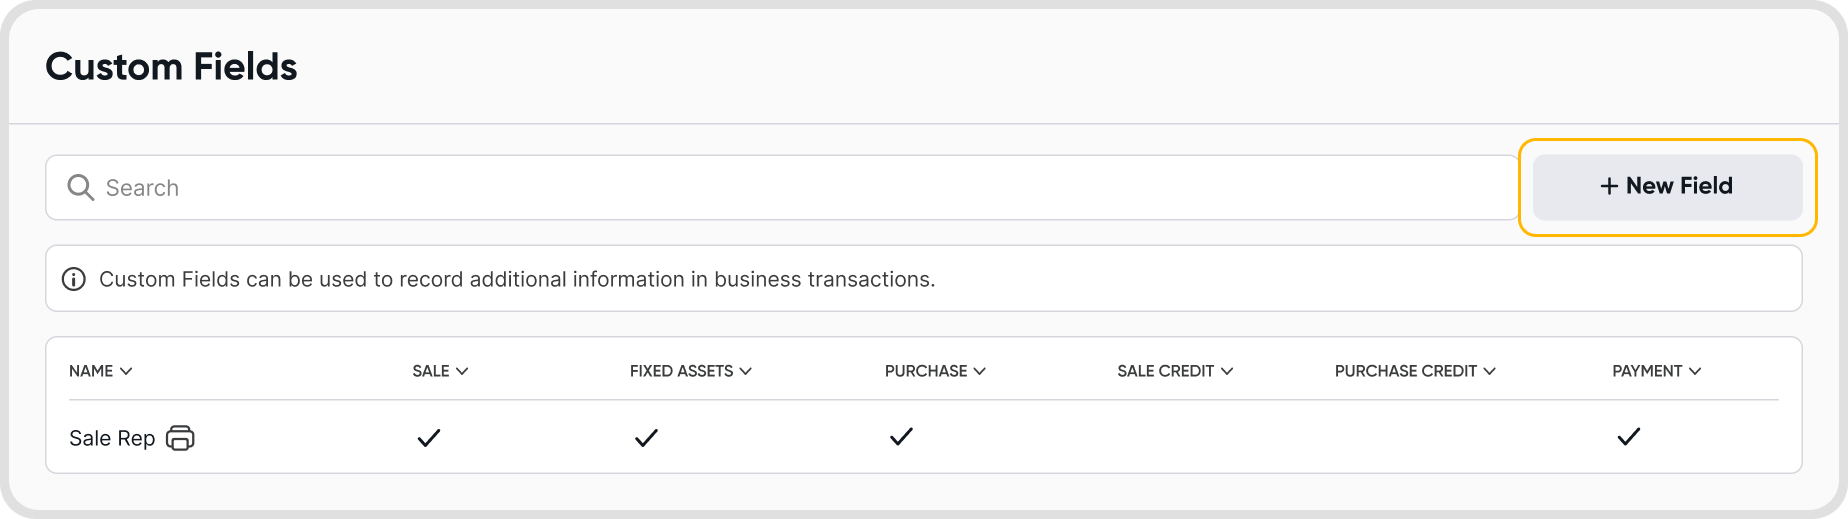
Go to Settings > under Configurations > click on Custom Fields.
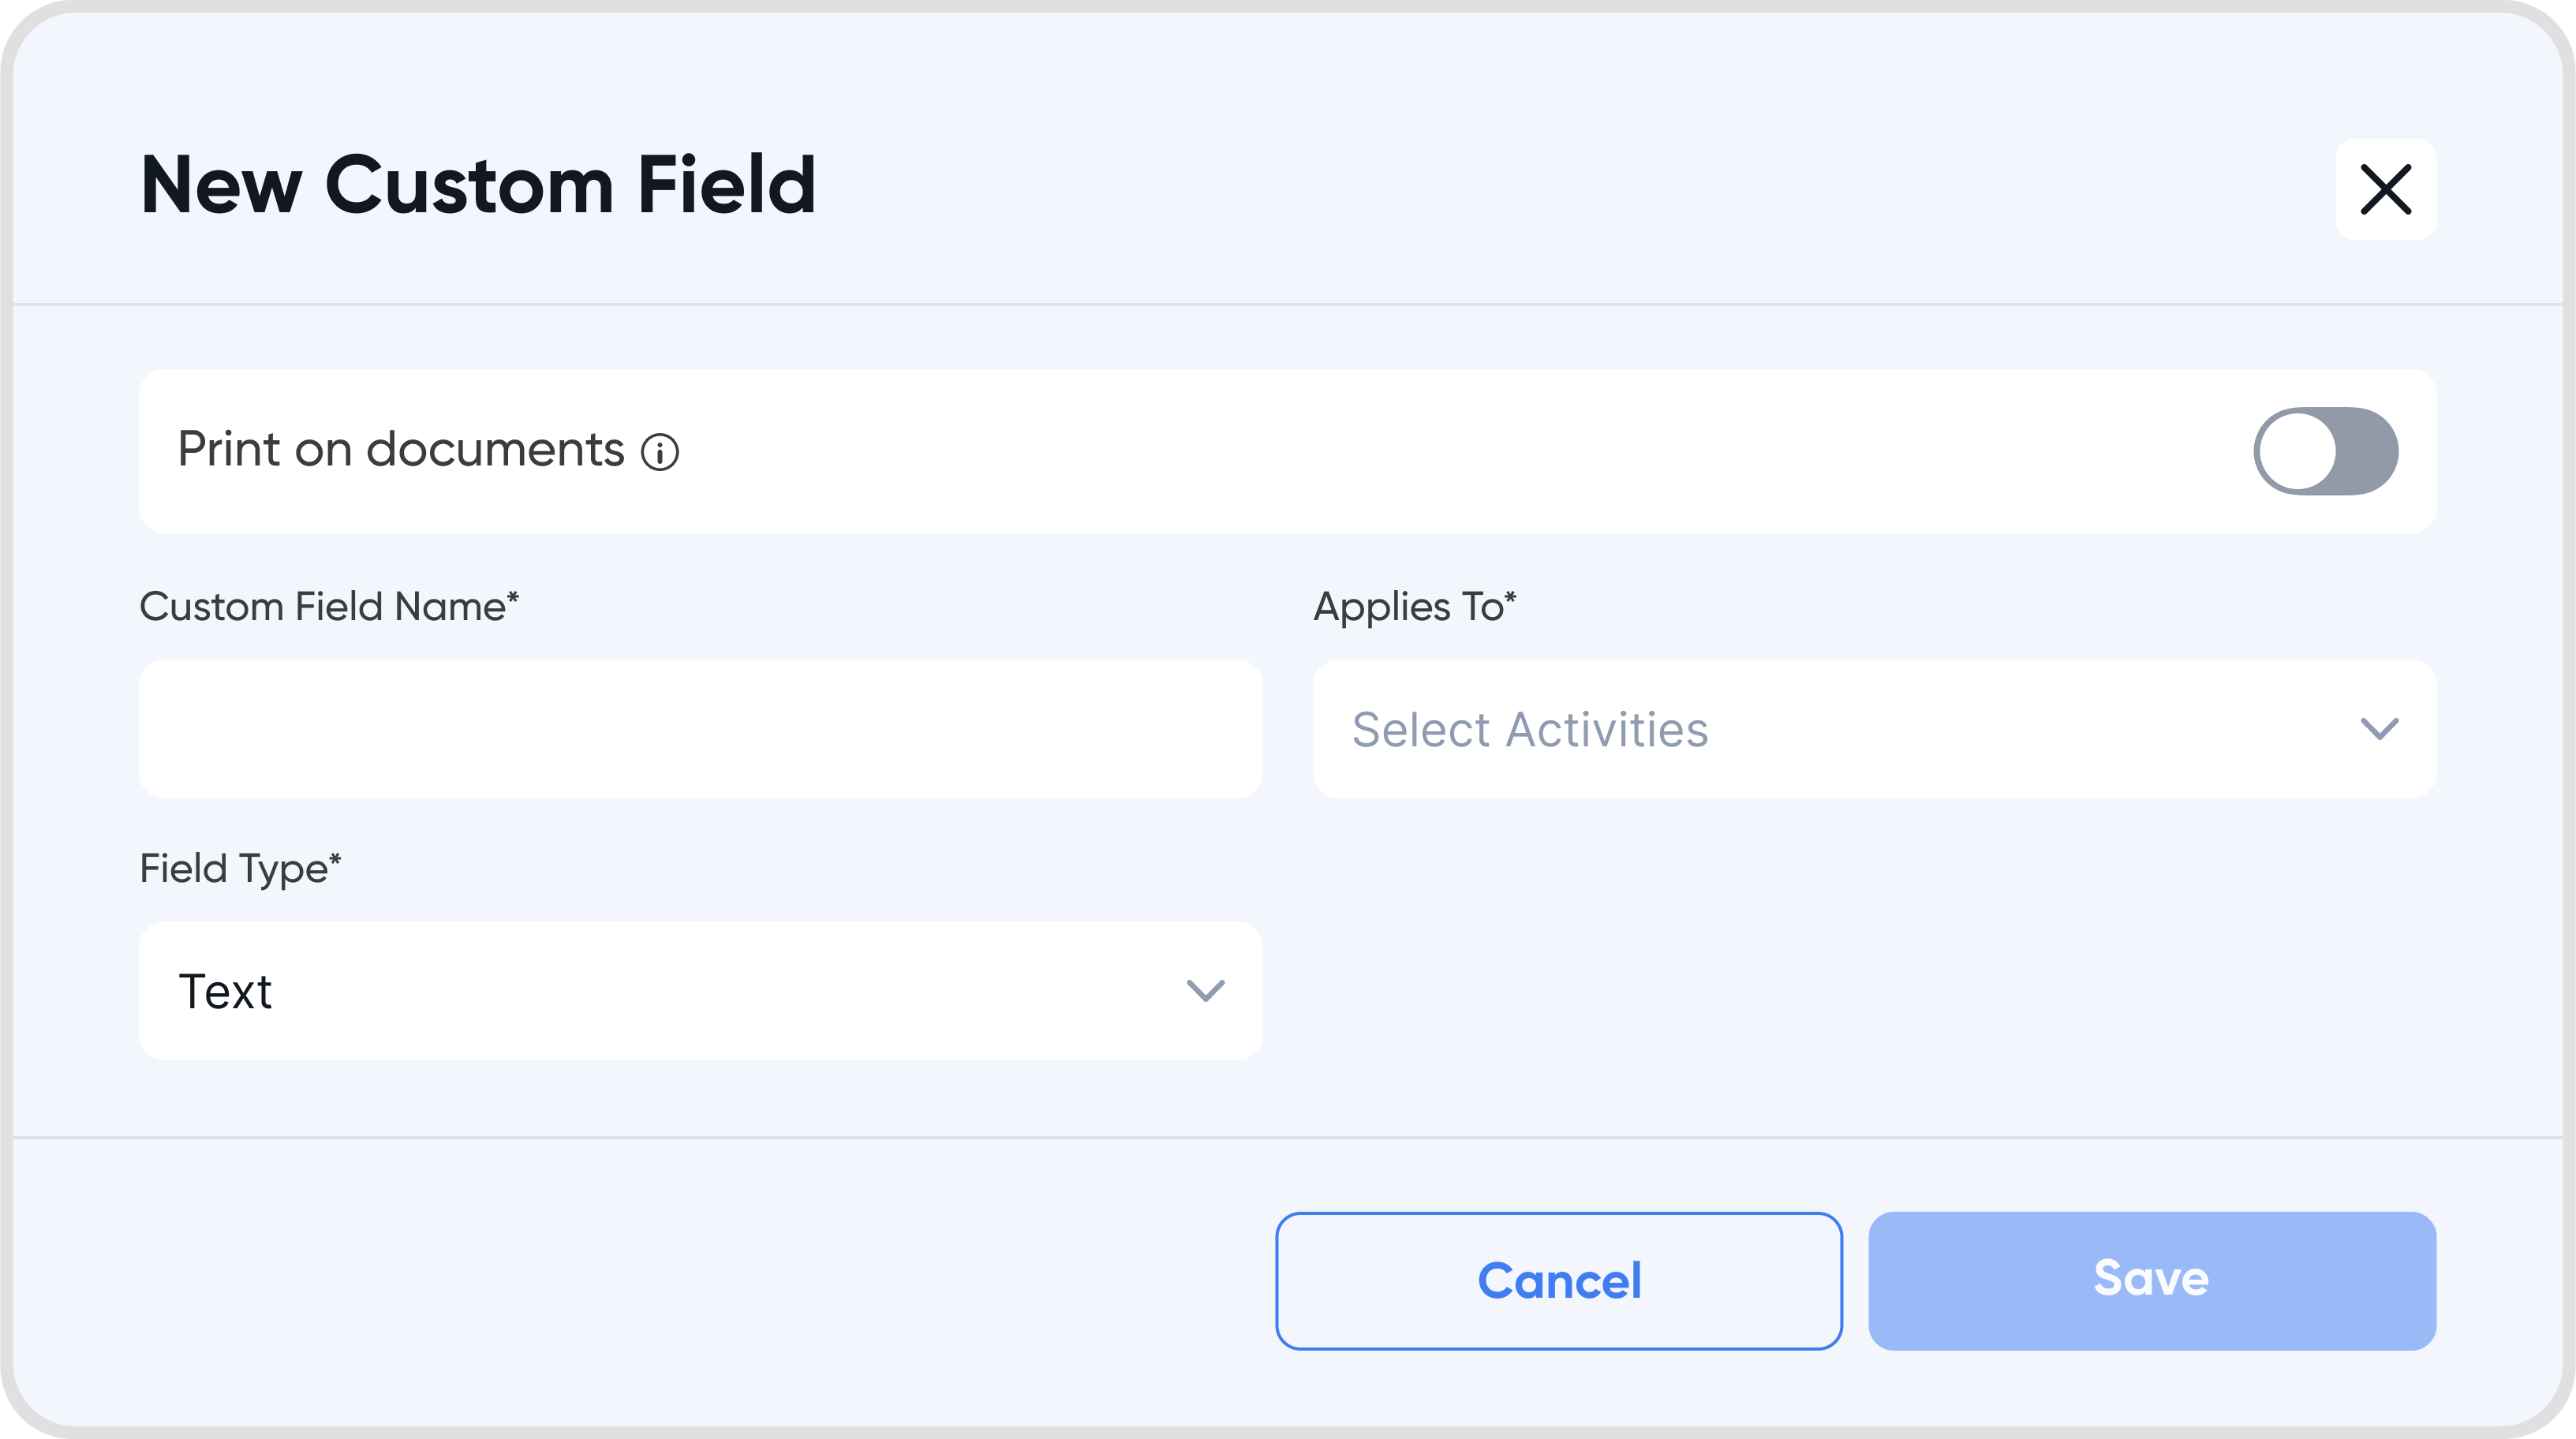
Click on + New Field to add a custom field. This will bring up the New Custom Field screen.
Print on documents: Toggle this on/off to enable printing the custom field on relevant documents.
Custom Fields can be applied in the following activities:
Invoices and Bills
Contacts
Customer & Supplier Credits
Fixed Assets
Items
Payments
Purchase Orders
Sale Orders
After creation, you will see the newly created custom field, and the business activities that the custom field can be used in.
After creating a custom field, it will appear as an input field in the activities it applies to.
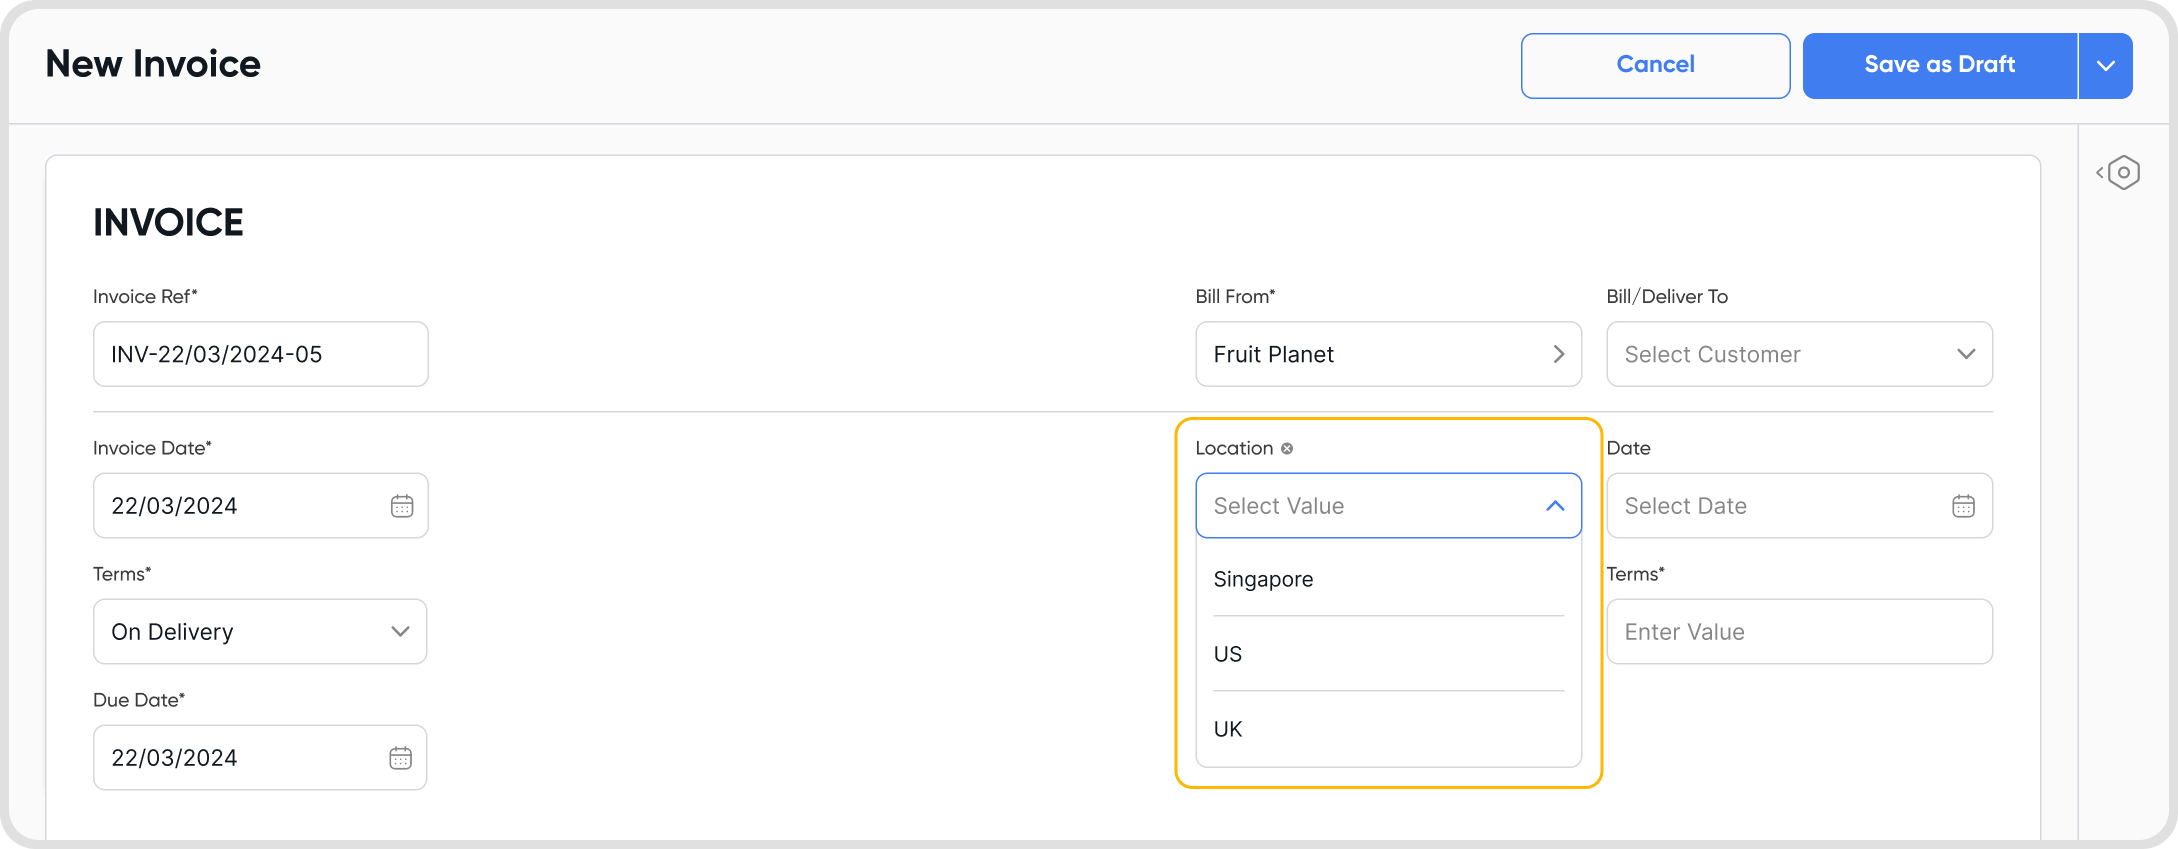
For Invoices, Bills, and Credit Notes, custom fields appear in the function tab on the right (or press F while in edit mode).
For other activities such as Contacts, they appear as a regular field.
Click the field to input values.
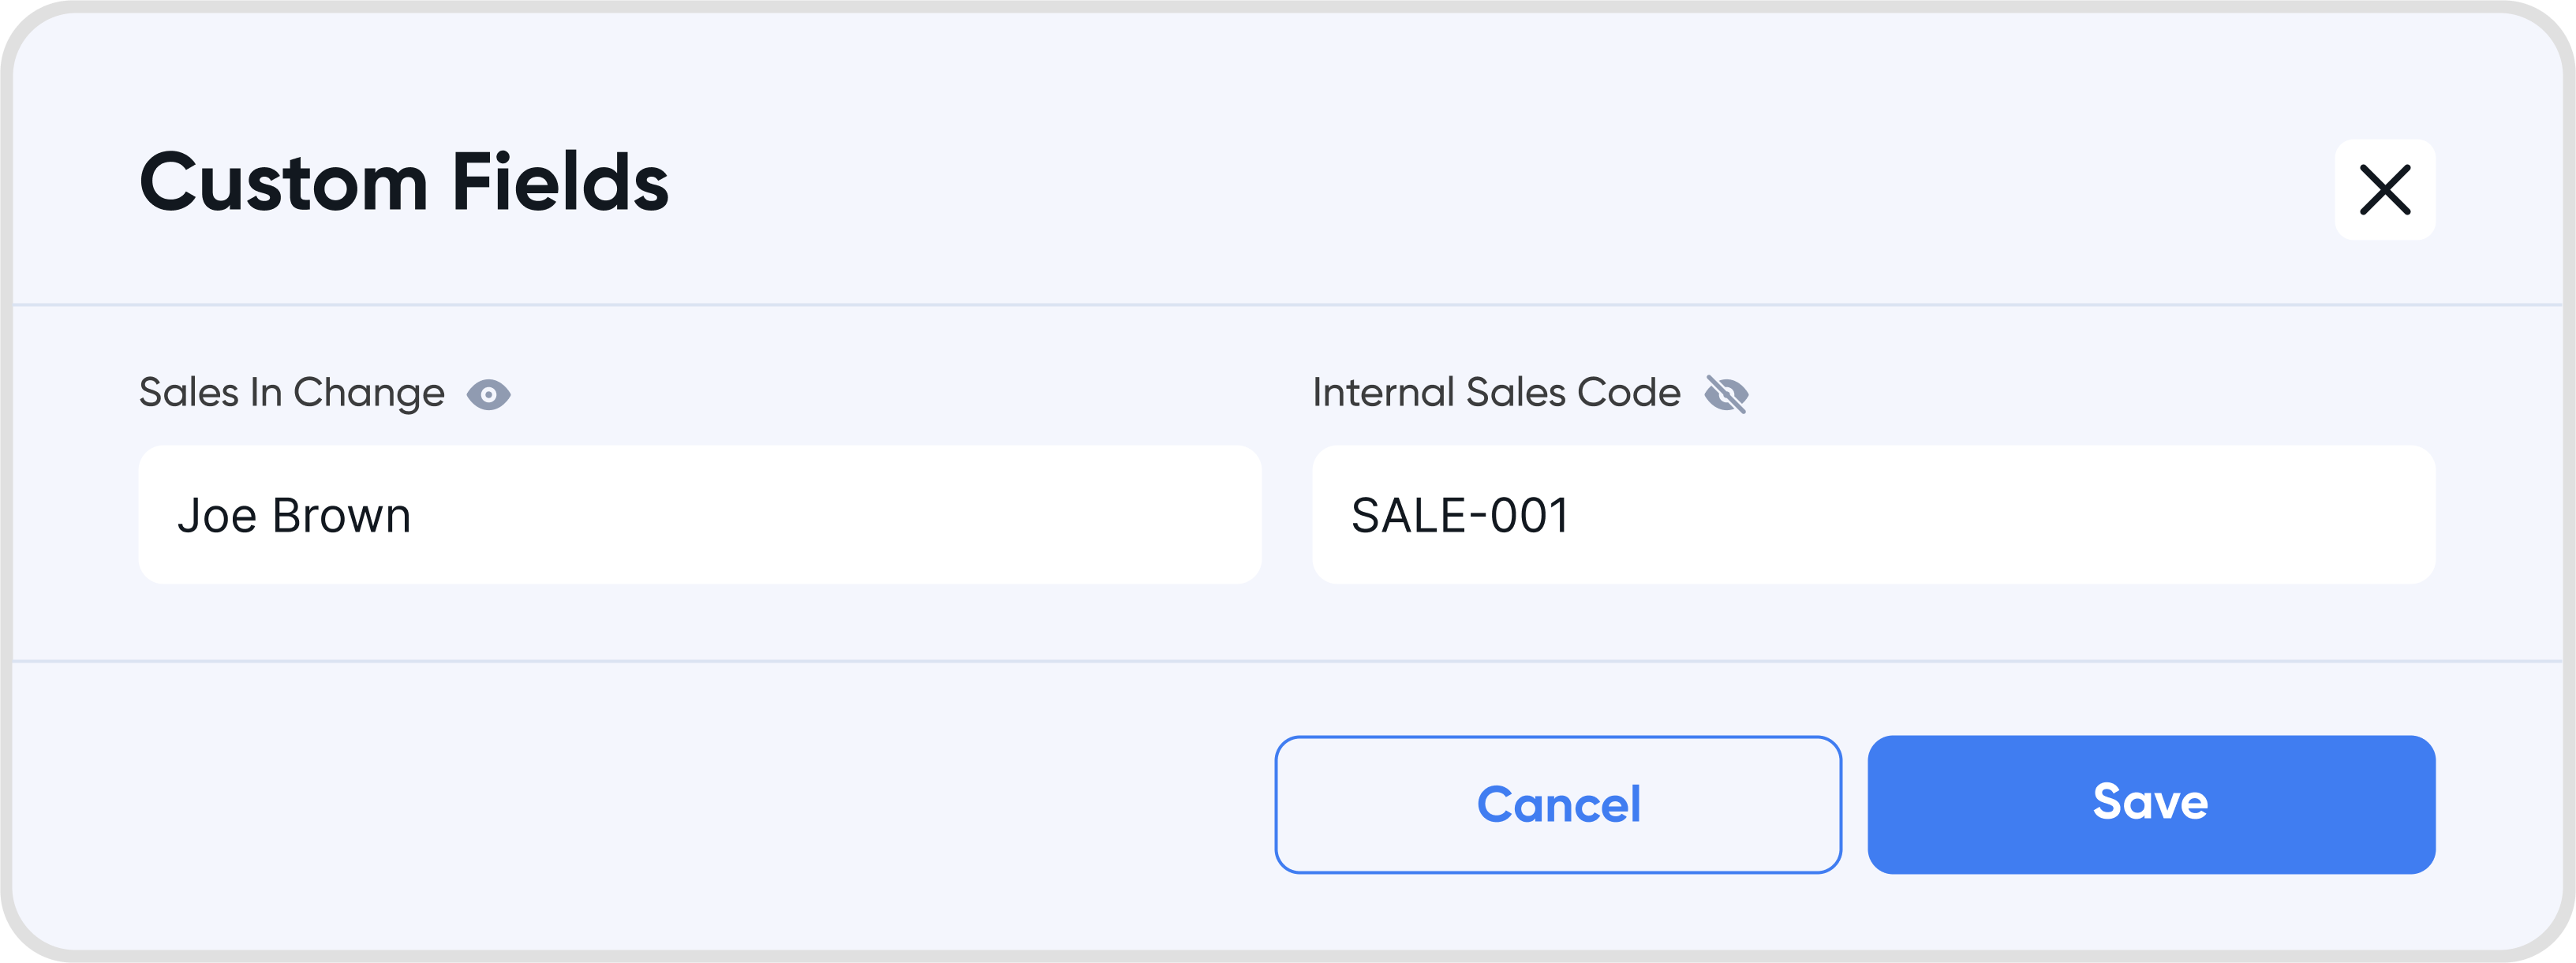
If the Print on document has been toggled off, the custom field will not be printed on the transaction document headers. However, you can still enter a value for the custom field.
For example, the Internal Sales Code custom field shown below has an eye icon with a strikethrough, indicating that this custom field will not be printed on the transaction document header.
However, the value SALES-001 can still be entered and saved, which can be viewed internally.
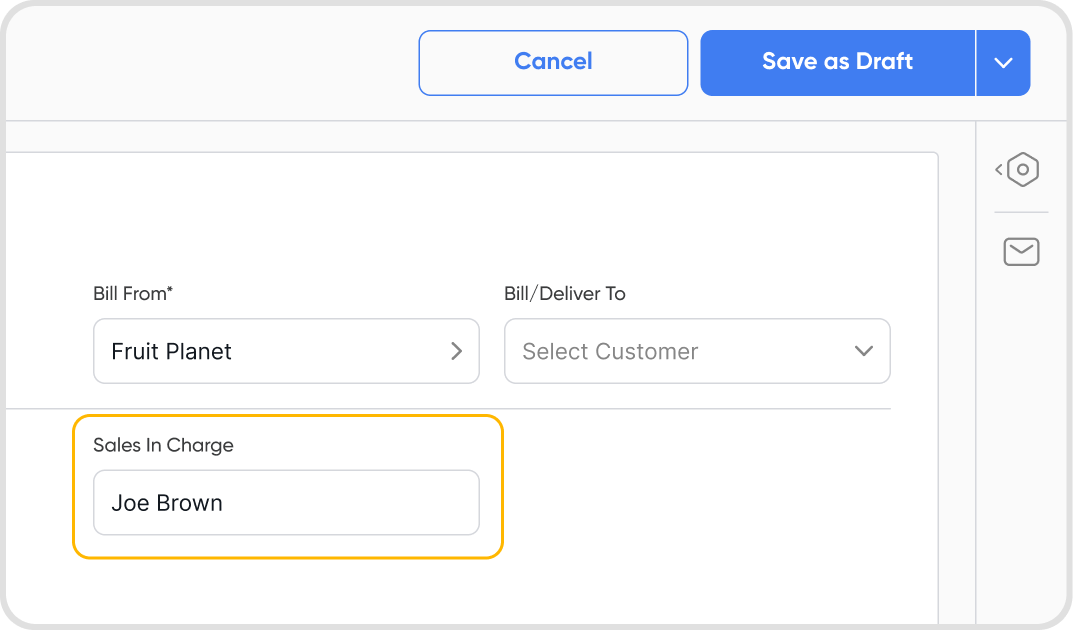
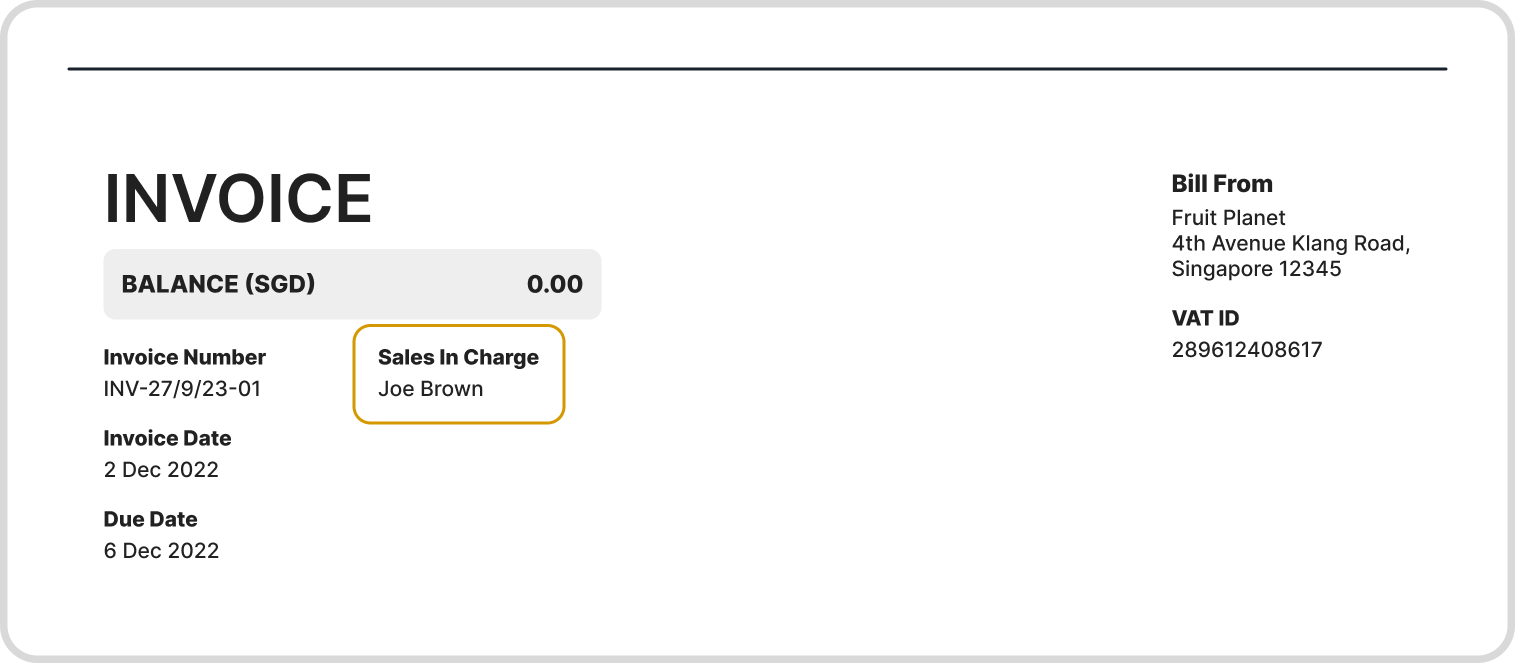
If Print on document has been toggled on, the custom field will also show up on the transaction document, and you can enter it directly from the document.
For example, the Sales in Charge custom field will be visible on the transaction document headers.
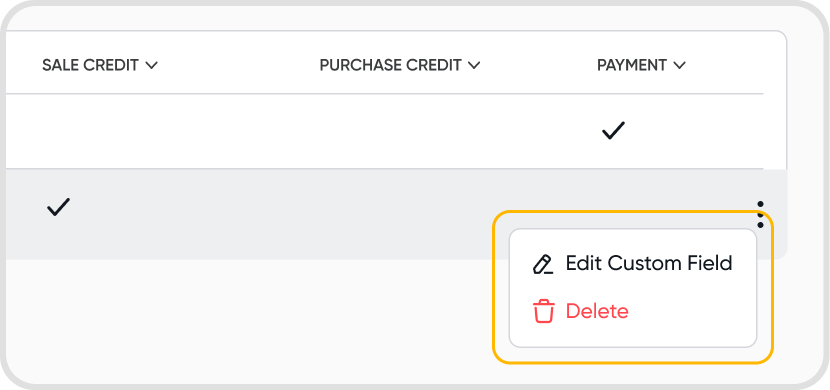
Go to Settings > under Configurations > click on Custom Fields
Click on the menu icon (3 dots), and choose Edit Custom Field.
Changing the custom fields will not affect the main transaction data. A custom field is a field you can add as additional information for a transaction.
Ensure that Print On Documents has been toggled on.
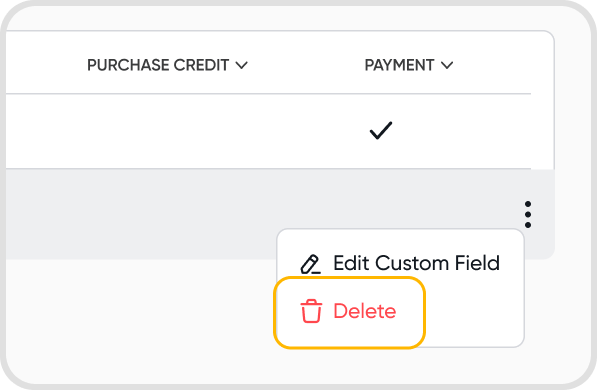
Go to Settings > Under Configurations > click on Custom Fields
Click on the menu icon (3 dots) > Delete
No, it will only affect the future transactions you create. The custom field will be selectable for future transactions.
Field type determines the nature of the custom field being created.
Juan supports 3 field types -
Text: Enables the creation of a custom text field.
List: Allows creating a custom field with predefined options in a list.
Date: Provides a date picker to select a specific date.